How to enroll employees on the clocking terminal - Geoface
|
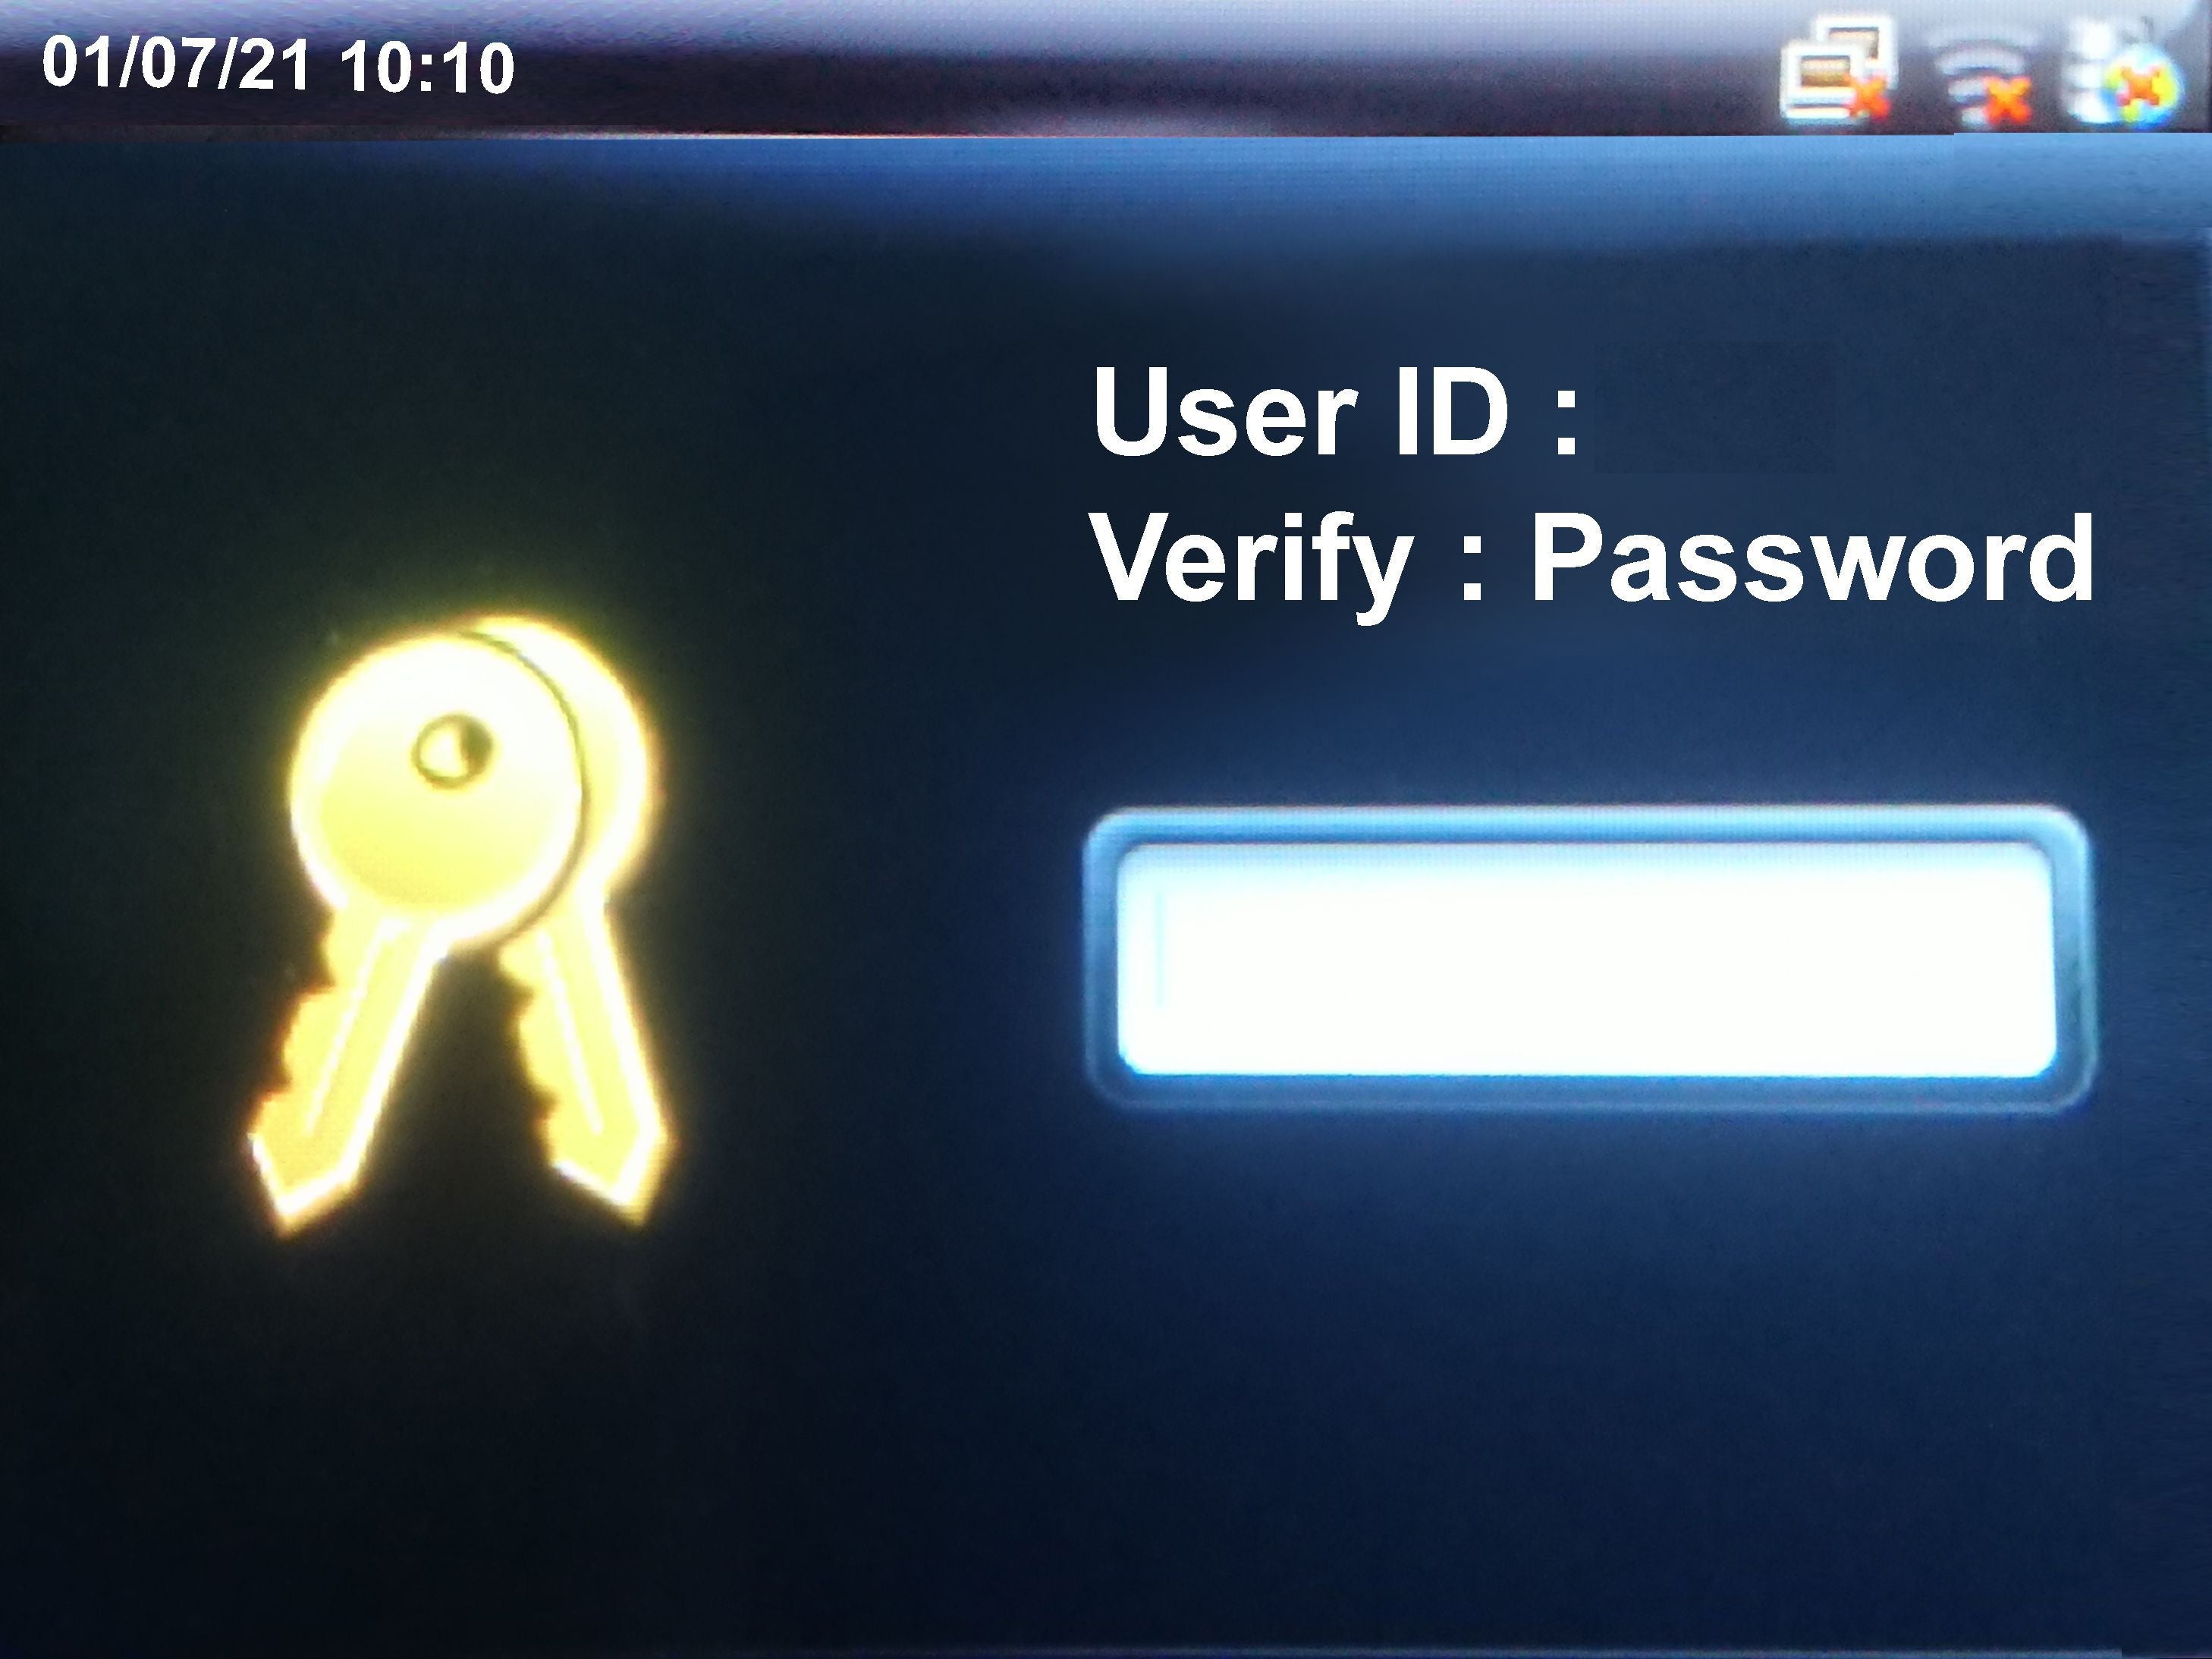
Log in using the username and password provided in the guide supplied with your clocking terminal.
Once logged you will see the “Main Menu” and navigate to User Mgt.
Add a new User.
We supply several different devices, Fingerprint, Card, Palm, Face recognition. The interfaces are generally the same but there is a variation when adding a user. User ID: This is a unique number you will choose for this user. It will default to 1 for the first user, but you can change this to whatever you would like. It is important that you note the number for each user you will setup as you will need that unique number when setting up the software. WE DO NOT TRANSMIT USER DATA SUCH AS NAMES OR BIOMETIC DATA ACROSS THE NETWORK. All we send between the device and our software is user ID, IN/Out and the time so this unique identifier is very important to note down accurately, to help setup the software.
Name: This can be anything. You may setup the employee’s name in the software as the given name but it can be set differently on this device if you wish as this will only show to the employee when logging in. User Role: Generally, this will be a normal user. You would set the appropriate person to super user so that they can access the main menu for admin purposes. Badge/Fingerprint/Face: These will be unique to the device purchased and a slightly different setup for each is required. Please see below. Password: Generally, you would not need to set this as this is more for a super user not a general user. This can be set up for general users so they may clock in, in the event they forget to bring in their card/fob/fingers or face.
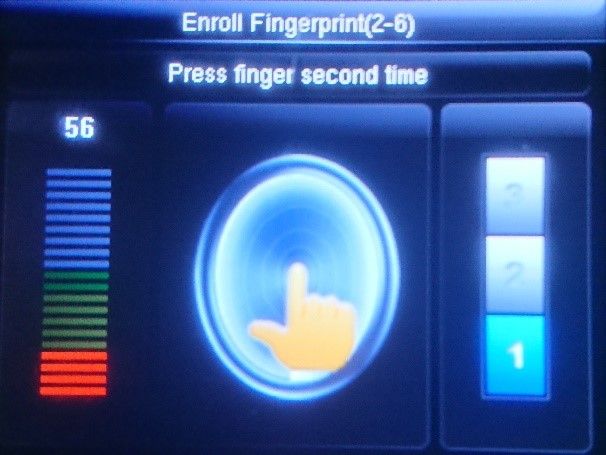
Badge/Fob/Fingerprint/Palm/FaceBadge/fob: Select this option and scan the badge or fob you would like to assign this user. Fingerprint: Select this option and you will see the below screen:
Finger 6 is the most common finger people wish to use and is selected by default. Select thee finger you wish to enrol
Place the finger on the scanner.
You will have to scan the same finger 3 times. If the finger has already been enrolled under a different user or a different finger number then you will get an error.
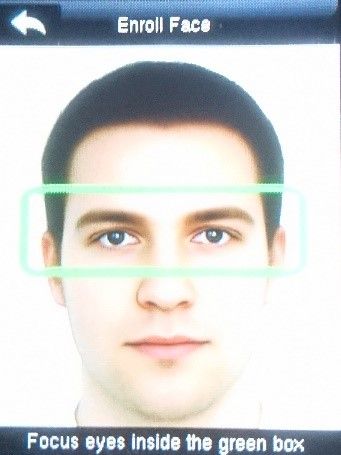
Once successful you should see the following screen. Add as many of the users fingers as you wish. Palm: Select palm and follow the instructions spoken to you. Face: Select face and follow the instructions spoken to you.
You have now added your users and complete the device setup. If your device has not been setup in its intended final location, please wait until the software is installed and you have tested the connection to the terminal before mounting the device. You may have a different Wi-Fi access point name at the mounting location so you may need to repeat the Wi-Fi connection process. If you have a signal issue at the mounting location then you may have to use the cable connection. |
|